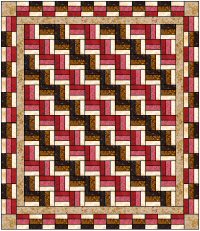
Rail Fence Updated
A twist on an old favorite.
by T. Mahone
Finished Size: 78" x 90"
Click photo for larger image.
Fabric Requirements:
 |
 |
 |
 |
 |
 |
|
Red 1-3/8 yards |
Pink 1-3/8 yards |
Beige 2-3/8 yards |
Black 1-1/8 yards |
Dark Brown 1-1/8 yards |
Medium Brown 2-1/4 yards (cut lengthwise - not pieced) |
Step One - Cutting
Red and Pink - 15 strips 2.5" wide by width of fabric (WOF)
Black and Dark Brown - 14 strips 2.5" by WOF
Beige - 29 strips 2.5" by WOF
*Medium Brown - 2 strips 3.5" x 72.5"
- 2 strips 3.5" x 66.5"
- 4 squares 6.5"
*You may wait to cut the 4 strips until you have pieced your center, cutting to your measurements.
Step Two - Making Rail Blocks
Sew 15 strip sets as shown below using the red, pink and beige fabric strips. Press all seams toward the red fabric. Cut the sewn strip set into 6.5" segments. You should get 6 blocks per strip. You need 88 blocks. NOTE: If your strip width does not measure 6.5" after sewing (say 6.25"), cut the strip set by your width measurement (6.25"). It is important that you are making squares, not rectangles.
Sew 14 strip sets as shown below using the black, dark brown and beige fabric strips. Press all seams toward the black fabric. Cut the sewn strip set into 6.5" segments. You should get 6 blocks per strip. You need 84 blocks. NOTE: Cut your blocks from the strip sets as indicated above. All of the blocks should be the same size.
Step Three - Piecing the Center
Using the layout below, you will use 120 of the blocks to make the center. Sew 12 rows with 10 blocks each. Make sure you have the blocks in the correct orientation. Press odd number of rows to the left and even number rows to the right. Doing so will allow the seams to lock together when sewing the rows together.
Step Four - Adding Borders
Sew the 3.5" x 72.5" strips to the left and right side of the center. Press seams toward the border. NOTE: If you cut your blocks to a different measurement than 6.5" in Step One, you will need to measure your quilt top before adding all borders.
Sew the 3.5" x 66.5" strips to the top and bottom of the center. Press seams toward the border.
For the pieced borders, piece the remaining rail blocks together as shown (make four):
![]()
Sew the left and right borders to the quilt top. Press the seams toward the rail border.
Sew the 6.5" square to each end of the remaining border units. Press the seams toward the rail blocks.
![]()
Sew the above border units to the top and bottom of the quilt top.
If you'd like to see alternate corner blocks, click here.
You have completed the Rail Fence Updated pattern! I'd love to have photos if you complete this pattern. Please forward photos to: teaquilts@teaquilts.com
Here is a mini quilt I made using 1.5" cut strips.
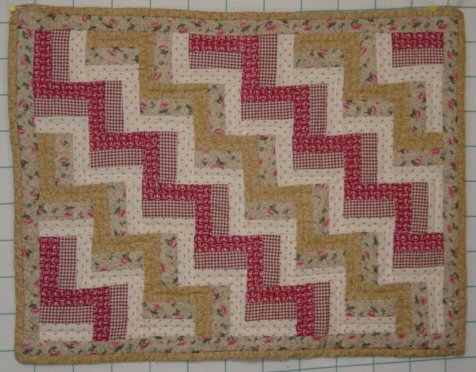
Mini Rail Fence by Teajuana Mahone
5/8/1996 to 5/24/1996
I'd love to have photos if you complete any of these patterns. Please forward photos to: teaquilts@teaquilts.com
Pattern copyrighted by T. Mahone of teaquilts.com
Created 4/15/2005